
Smartphone Product Photography: How to Take Professional Photos with Your iPhone or Android
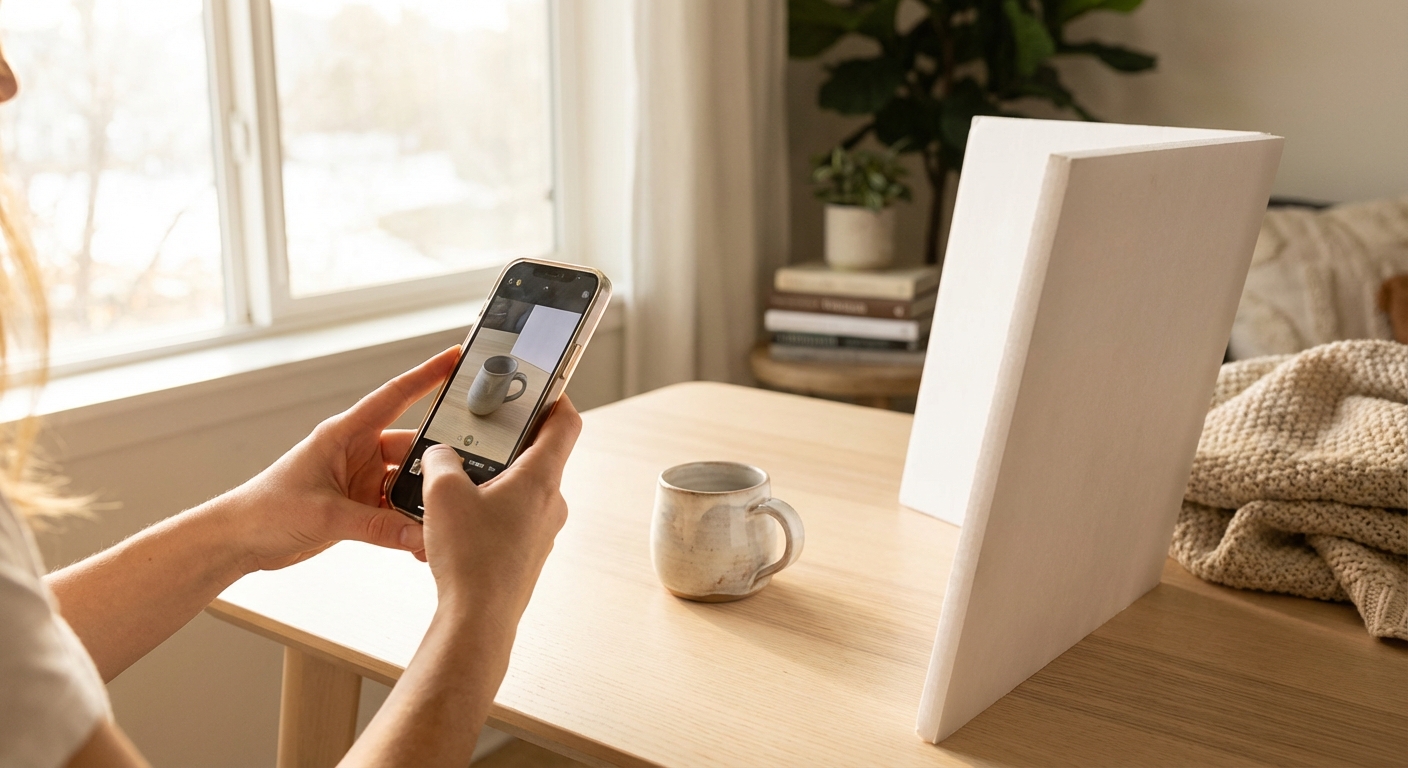
No DSLR? Good. Your smartphone camera is more capable than you think. Here's how to take product photos that actually sell, using the phone already in your pocket, some cheap foam board, and a window.
That $1,000 camera in your shopping cart? Close the tab.
I know, I know. It feels like you need "real" equipment to take photos that don't look like you shot them on a potato. But here's the thing: your iPhone or Android already has a camera that would've cost thousands just ten years ago. The problem isn't your gear. It's how you're using it.
This is everything I wish someone had told me when I started photographing products with my phone.
Can smartphone photos actually compete?
Let's get the awkward question out of the way. Can phone photos really work for selling products?
Honestly? For most sellers, yes.
Here's why I say that:
Modern smartphones shoot 12-50+ megapixels. Amazon only requires 1000x1000. You're covered.
Your phone's computational photography (night mode, HDR, portrait mode) handles problems that used to require expensive gear and years of experience.
Product photography is controlled. You're not chasing a cheetah or catching a baseball mid-swing. You control the lighting, the product, the timing. Phones are great in controlled environments.
And here's the kicker: 67% of your customers are shopping on their phones anyway. Photos shot on phones often look more natural on phone screens.
That said, phones have real limitations. I'll be honest about those at the end so you know when it's time to level up.
What you actually need (under $50)
You don't need much. A few cheap additions make a real difference though.
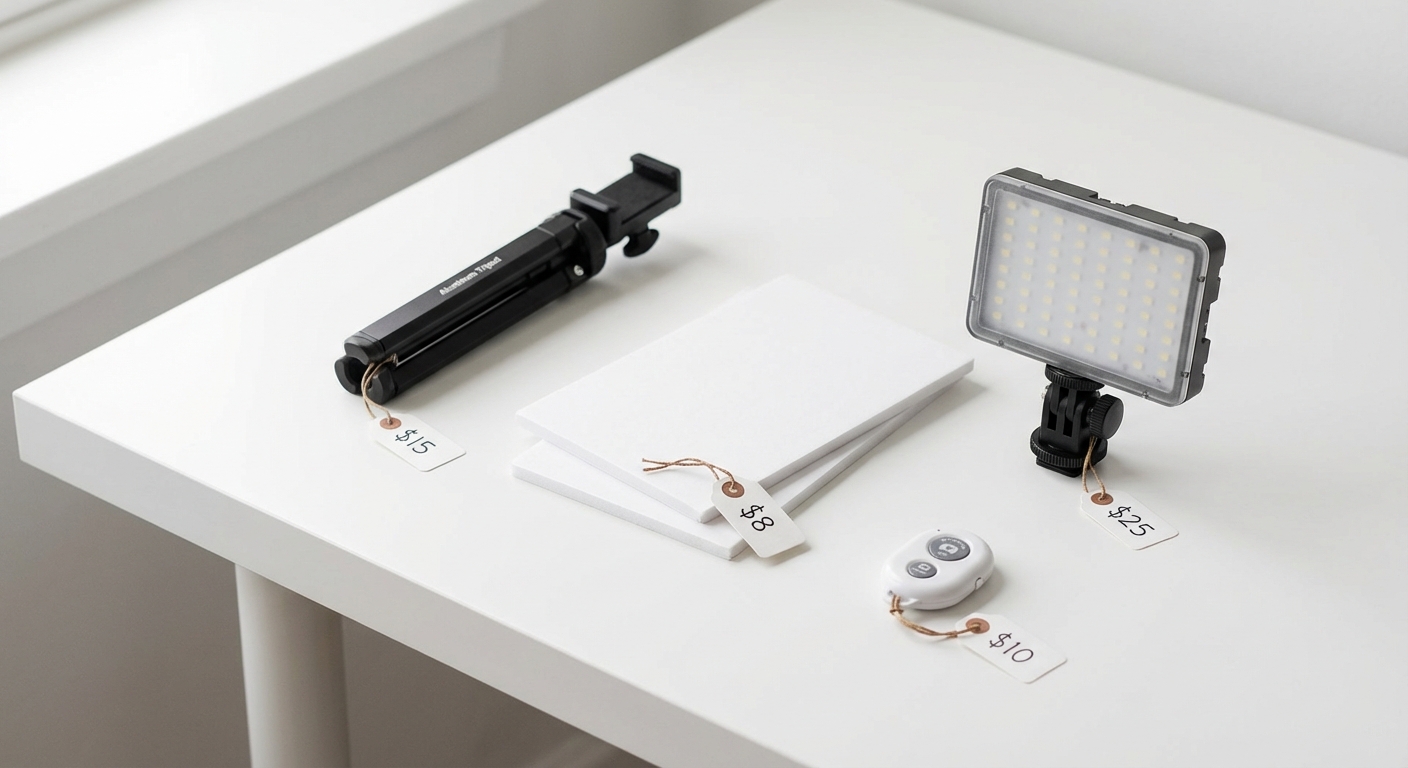
The essentials
| Item | Cost | What it does |
|---|---|---|
| Smartphone tripod or mount | $15-25 | Stops camera shake. Lets you get consistent angles. |
| White foam board (2-3 sheets) | $5-10 | Background. Also bounces light to fill shadows. |
| A big window | $0 | Sunlight is free. |
If you want to go further
| Item | Cost | What it does |
|---|---|---|
| Bluetooth shutter remote | $5-10 | Tap the button without touching (and shaking) your phone |
| Small LED panel | $20-40 | Consistent light on cloudy days |
| DIY lightbox | $10-20 | That seamless white background look |
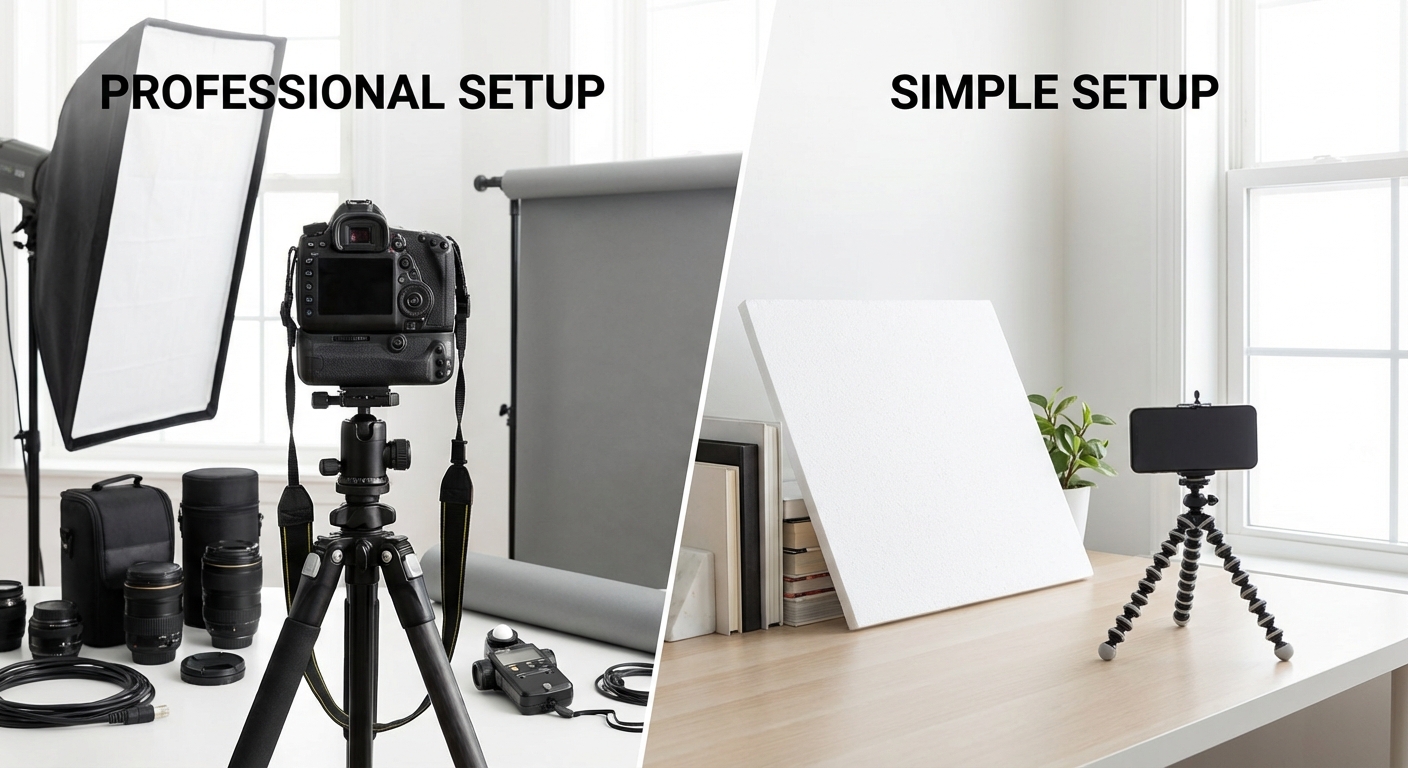
That's $25-125 total. Compare that to $2,000+ for even a basic DSLR setup.
Lighting makes or breaks everything
I'm not exaggerating. Get the lighting right and you're 80% of the way to a good photo. Get it wrong and no amount of editing will save you.
The window setup (free)
Here's what works:
- Find a big window. North-facing is ideal because you get soft, even light all day. Any window works on overcast days.
- Put your product 2-3 feet from the window.
- Prop a white foam board on the opposite side of the product. This bounces light back and fills in the shadows.
- Shoot between 10 AM and 3 PM when the light is consistent.
One thing: avoid direct sunlight streaming through the window. It creates harsh shadows that are a pain to fix later.
DIY tricks that actually work
Shower curtain diffuser. Hang a white shower curtain between the window and your product. It softens harsh light the same way expensive diffusion panels do. I learned this from a food photographer and it's borderline magic.
Foam board box. Make a three-sided box out of foam boards. Put your product inside, open side facing the window. Light bounces around from every direction. Shadows basically disappear.
Bed sheet overhead. For flat-lay shots, hang a white sheet above your setup. Softens everything.
When you need artificial light
If natural light isn't reliable where you are:
Use daylight bulbs (5000-6500K). They match natural light color.
Don't mix light sources. Natural light plus tungsten bulbs creates weird color casts that are almost impossible to fix.
Put lights at 45 degrees to your product. One main light, one on the opposite side to fill shadows.
Composition basics
I'll keep this section short because you don't need a photography degree.
The rule of thirds
Enable the grid overlay in your camera app. Most phones have this in settings. Put your product where the grid lines intersect instead of dead center. That's it. Instantly more interesting photos.
Fill the frame
Your product should take up about 85% of the image. Amazon actually requires this. But it's also just good practice. Small product floating in the middle of a big white space looks amateur.
Pick an angle and stick with it
Consistency matters more than perfection. Here's a rough guide:
| Product type | Best angle |
|---|---|
| Flat stuff (books, prints) | Straight overhead |
| Tall stuff (bottles, vases) | Slightly above eye level |
| Boxes and jars | 30-45 degrees, showing two sides |
| Gadgets | Three-quarter view so you can see the shape |
Leave some margin
Don't cram your product edge-to-edge. Leave 10-15% breathing room. Cramped photos feel cheap.
Camera settings that matter
Auto mode is fine for most things. But these tweaks help.
iPhone
Lock your focus and exposure. Press and hold on your product until you see "AE/AF LOCK." This stops the camera from hunting for focus or changing brightness while you shoot.
Adjust exposure. After locking, swipe up or down to brighten or darken. For white backgrounds, go a bit brighter.
Use the 1x or 2x lens. The ultra-wide distorts edges. The telephoto gives a more flattering perspective.
Turn on grid lines. Settings > Camera > Grid.
Android
Use Pro or Manual mode if your phone has it. You get control over focus, exposure, and white balance.
Lock focus. Tap and hold on the product.
Set white balance manually if you're near a window. Prevents weird color shifts.
Shoot RAW if you can. More flexibility when editing, though files are bigger.
Don't use digital zoom. It just crops and makes things blurry. Walk closer instead.
For any phone
Wipe your lens. Seriously. Fingerprints cause haze.
Use airplane mode. Nothing ruins a shot like a phone call vibrating your setup.
Make sure your battery is above 80%. Camera apps drain batteries fast.
The actual workflow
Here's the process I use. Takes about 10 minutes per product once you get the hang of it.
1. Prep the product
Clean everything. Fingerprints and dust show up way more in photos than you'd expect.
Steam clothing. Wrinkles photograph badly.
Remove tags and stickers. Position logos to face the camera.
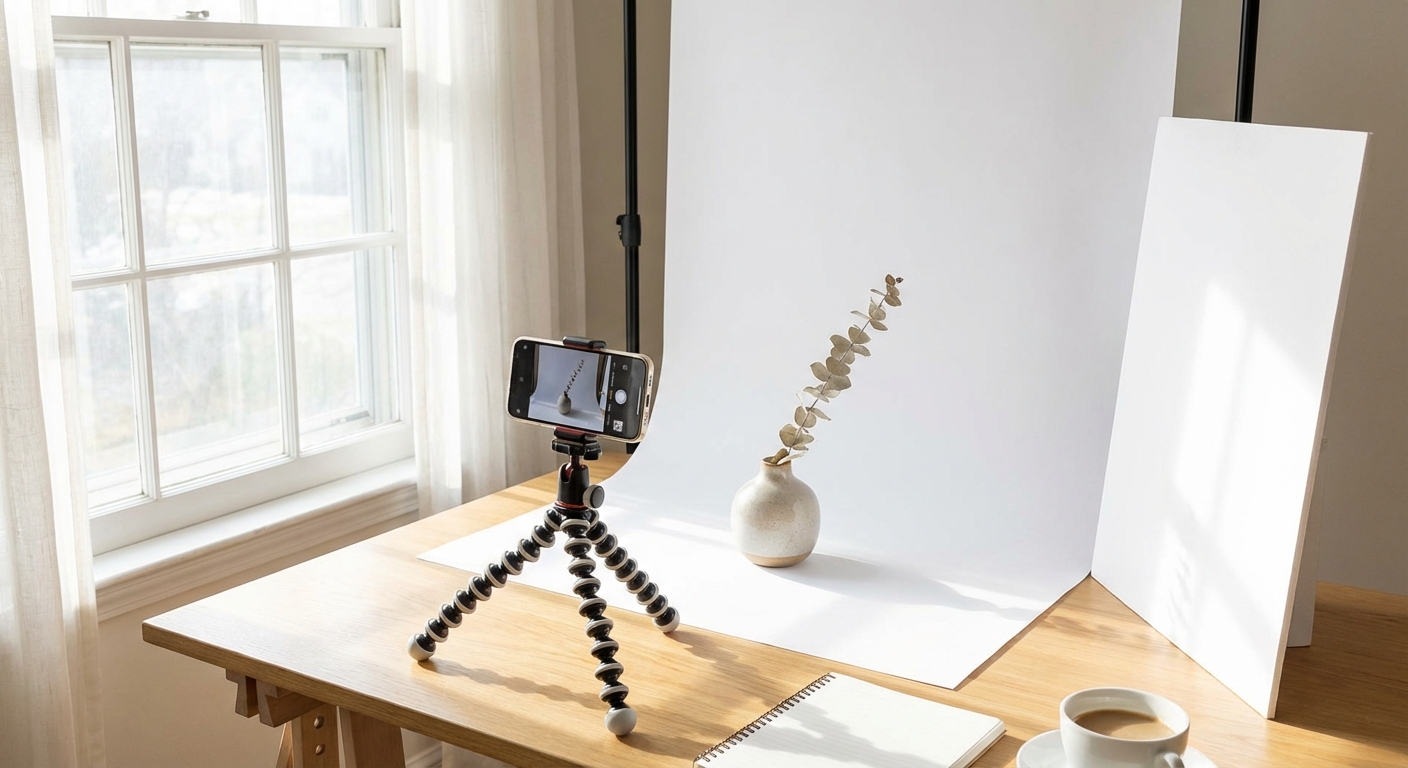
2. Set up the background
For white backgrounds: Curve your foam board so there's no visible line where the "floor" meets the "wall." Make sure the background extends past the edges of your frame.
For lifestyle shots: Pick surfaces that make sense for your product. Wood for handmade stuff. Marble for luxury. Fabric for cozy vibes.
3. Get the lighting right
Main light at 45 degrees to the front of your product. Foam board or second light on the opposite side.
4. Mount the camera
Put your phone in the tripod. Match the angle to your product type. Make sure the phone is level so you don't get weird distortion.
5. Frame and focus
Enable the grid. Tap to focus on the most important part of your product. Lock focus and exposure. Bump exposure up slightly for white backgrounds.
6. Take a bunch of shots
I usually take 5-10 photos of each setup without moving anything. This gives me options and I can pick the sharpest one later.
7. Get different angles
Front. Back. Side. Detail shots of anything interesting. One shot with a hand or common object for scale.
Free editing apps
Your photos will need some editing. These apps are free and do the job.
Snapseed (iOS and Android)
This is my go-to. It has surprisingly powerful tools for a free app.
Basic workflow:
- Crop to your final composition
- Tune Image: bump brightness (+10-20 for white backgrounds), adjust contrast
- White Balance: fix any color casts
- Selective: brighten or darken specific spots
- Details > Structure (+15-25): brings out texture
- Healing: remove dust spots
Lightroom Mobile
Better for batch editing. Create a preset once, apply it to 50 photos. The free version has most of what you need.
Canva
Good for adding text overlays and creating infographics for secondary product images.
Remove.bg
One-click background removal. The free version limits resolution, but it's handy for quick tests.
VSCO
Nice presets if you want a cohesive look for social media.
What you can fix
Here's a quick reference for common problems:
| Problem | Fix |
|---|---|
| Background looks gray instead of white | Better lighting + bump exposure in editing |
| Harsh shadows | Add a foam board reflector on the dark side |
| Product looks flat | Change your angle, add side lighting |
| Colors are off | Adjust white balance in camera or editing |
| Photo looks "meh" | Add a touch of sharpening and contrast |
When phone photos are enough
Be honest with yourself. Phone photos work great for:
Most product categories. Clothing, accessories, home goods, beauty, food, crafts. Phones handle these well.
Testing new products. Don't invest in professional photography until you've proven people want to buy.
Social media. That casual, authentic phone look often performs better than overproduced studio shots on Instagram and TikTok.
Small catalogs. If you have under 50 products, the time and cost of studio photography doesn't make sense.
Fast-moving inventory. If you're adding new products every week, phones let you move quickly.
When to level up
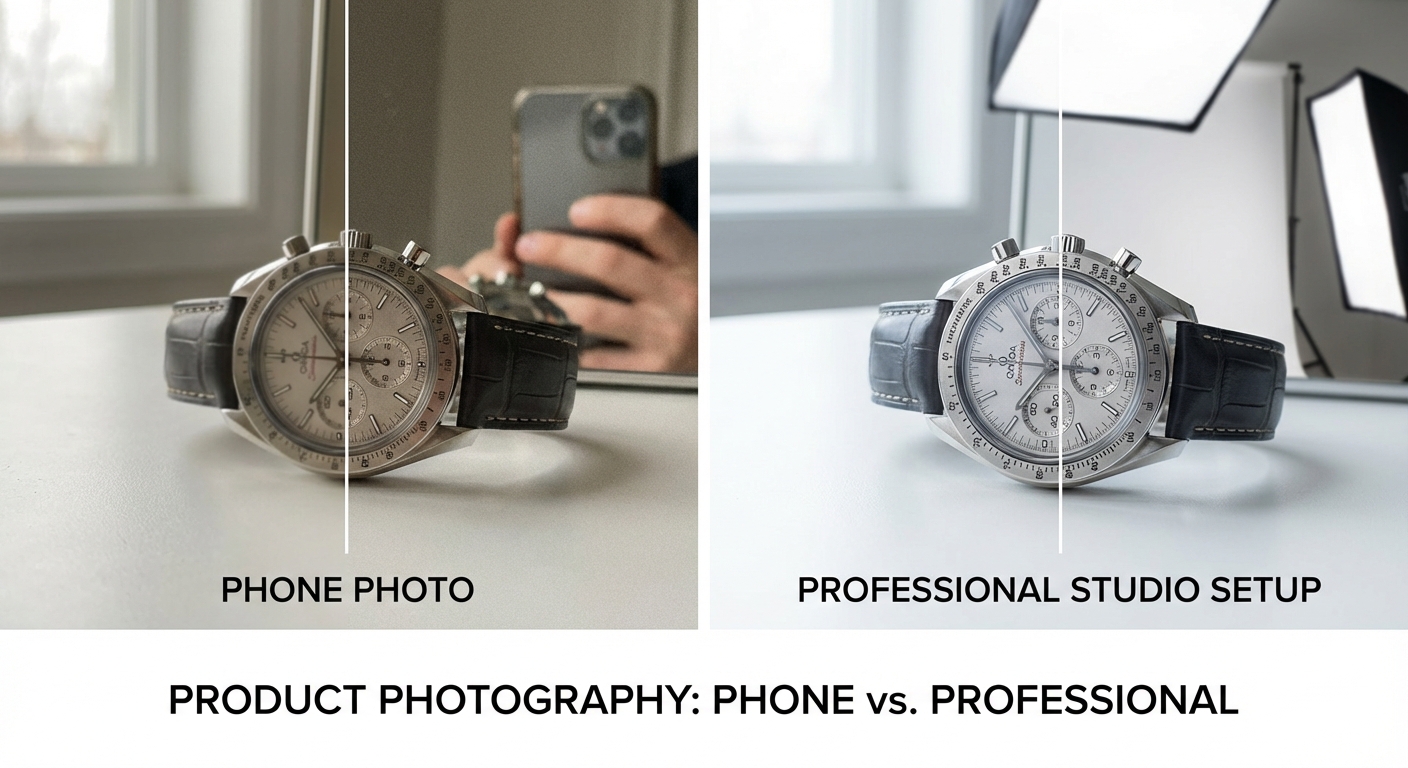
Phone cameras have limits. Be realistic about these:
Fine jewelry and watches. Extreme close-ups push phones past their comfort zone.
Luxury products. Buyers spending $500+ expect photography to match. The psychology matters whether we like it or not.
Color-critical products. Cosmetics, fabric swatches, paint samples. Phones struggle with precise color matching.
Large catalogs. Once you hit 100+ SKUs, studio efficiency starts to make more sense.
Competitive categories. If everyone else has polished photos, you can't afford to look worse.
The middle path: phone + AI
Here's something a lot of sellers have figured out: take the photo with your phone, then let AI handle the polish.
Capture on your phone. No studio booking, no gear setup.
AI processing gives you clean backgrounds, fixed lighting, consistent styling.
You can generate multiple versions from one source photo.
It's fast enough to keep up with weekly product launches.
Modern AI tools can take your phone snapshot and swap the background, fix the lighting, generate lifestyle contexts, and make sure everything passes marketplace requirements.
Start here
You have everything you need already.
- Enable grid lines in your camera settings
- Find a big window with indirect light
- Grab a $5 foam board
- Follow the workflow above
- Edit in Snapseed
Your first photos won't be perfect. That's fine. They'll still be better than most of your competitors who never learned the basics.
Pixtify can take your phone photos and polish them into professional marketing images in a few minutes.
Related reading:
Pixtify Team
AI Product Photography
Ready to transform your product photos?
Join thousands of sellers using AI to create professional product images in minutes.
Get Started FreeNo credit card required